Sunday, March 25, 2012

New York Crumb Cake

Over Spring Break Brandon Graham and I went to visit our newly wed friends Mike and Andrea in Tallahassee! It was tons of fun to catch-up and I have to admit it was kind of nice to be the guest instead of the host. (I will admit however- traveling with a baby is definitely not for the faint of heart. You think I would know this by now... but we keep trying. lol)

On our last night there- I got the itch to bake.  Andrea Brandon and Mike fanned the flames and before I knew it I was scouring my Pinterest "Dazzling Desserts" page to find a recipe to try out.  I was thinking something with cinnamon...

Initially I planning to go for something along the lines of cinnamon rolls- but it seemed too work intensive at the time. So the obvious choice was a crumb cake! (...did I just imply that crumb cakes are quick and easy? Yeah no.)

I'd never made a crumb cake before though- so I was going in blind.  The picture looked appetizing and that was good enough for me.  Besides- it was a cake in a casserole dish. Those are always super easy and fail-proof right?

After the necessary trip to the store for missing ingredients, I made myself at home in the Kanis kitchen. (I'm going to do a shout-out to Andrea here for having such an amazingly well-stocked kitchen which included this awesome set of heavy-duty brightly colored mixing bowls. I am in love with them!)

new york crumb cake recipe 
THIS is literally the tutorial I followed to make my crumb cake. Apparently the original recipe is from Martha Stewart? I should have known... (NO that is NOT my picture. This is the picture that made my subconscious drool and inspired me to attempt to tame the crumb-cake beast.) Let me suggest to everyone out there that if you have an iphone- resist the urge to refer to it constantly while baking.  You WILL get flour ALL up in there and that is a sad sad thing. 

___________________________________________________________
The Recipe:
2 Tablespoons canola oil
4 cups flour
1/2 cup sugar
2 1/2 teaspoons baking powder
1/2 teaspoon salt
1 egg
1/2 cup milk
2 teaspoons vanilla
1 cup packed brown sugar
1 1/2 teaspoons cinnamon
2 sticks butter, melted and cooled
confectioners’ sugar 
___________________________________________________________

So... here I am getting started. You combine all your dry ingredients in a mixing bowl and... mix. :)
1.5 cups of flour
.5 cup Sugar 
2.5 teaspoons Baking Powder
.5 teaspoon Salt

I may or may not have accidentally added 2 TABLESPOONS of salt when I was trying to read this tiny recipe on my flour-covered phone late at  night. (...in case you missed all those excuses it totally wasn't my fault. I was hoping no one would notice...) 

Next you combine your wet "cake" ingredients into a small separate bowl.
1 egg
.5 cup milk
2 tablespoons oil
2 teaspoons vanilla


I liked this part. I thought it was cool to see all the ingredients kind of chilling out separately in the bowl- and then whisking it all together until they were all one milky solution. 

Then you dump that little bowl into the big bowl and mix. :)


At this point- the tutorial I was following had the person using one of those special "spatula spreader" thingys. I saw one in Andrea's utensil jar on the counter- but it had a wooden handle and I wasn't sure how particular she was about her wooden utensils getting wet food on them. I know some people (*cough* me *cough*) are really particular about wooden kitchen tools. She later cleared it with me though and I wish I would have just asked because it would have made my life a lot easier when I had to get the mix from the bowl into the pan.

Make sure you spray your pan with non-stick cooking spray (PAM) first. :)


Here I began to become sincerely concerned about the recipe.  I didn't feel like I had enough cake batter.  It ended up being barely enough to make a super thin layer across the bottom of the pan. I referenced the tutorial again- double checked the ingredient amounts and the pan size... everything checked out. So I took a deep breath- and kept going.


I always wondered how the crumbs in crumb cake were made.  Now I know.
And you're about to know too. :)

Combine your dry ingredients for the "crumb" part in a large mixing bowl. 
2.5 cups flour
1 cup packed brown sugar
1.5 teaspoons cinnamon
Once again don't they look pretty in their own little sections? (I'm a nut.)
I felt strangely powerful unscrewing the top to the cinnamon and pulling out two hefty scoops.  It smelled awesome. Everyone should use cinnamon. It is a gift from the heavens. I sincerely believe in that. Even if it gives me heartburn. lol

Then melt your butter in a small microwave-safe bowl.
2 Sticks Butter
And let it cool to room temperature. 


I was really proud of my butter. I know it was probably like the easiest part of the whole recipe- but normally I always over-heat my butter and it ends up boiling and going crazy all over the place.  This time it was perfect. All melty and ready for mixing!

Combine your butter with your dry crumb ingredients.
Mix!
(check-out that wooden-handled spatula spreader thingy!)


It took awhile for my crumbs to get crumbly enough. I just kept stirring though and they turned out.  My mixture was super sticky so I put in a small handful of extra flour to help move things along. 

At this point- turn on your oven. (I know you forgot to preheat it.)
It should be set to 325 degrees F.

Sprinkle your crumbs evenly across the top of your cake mixture in the pan.
Once again I sincerely thought I didn't have enough- but the crumbs more than made-up for the tiny amount of cake batter and I had enough to go over the top of the pan several times.


Into the oven!
Bake your cake for 20 minutes.
Or "until a toothpick comes out clean". 

The recipe says to rotate your pan at least once.  I just cooked it ten minutes, turned it around, and cooked it for another ten.  I didn't have a toothpick so I used a fork.  After the full 20 minutes it came out clean so I took it out!

I let it cool as long as I could stand before dusting it with powdered sugar, cutting it into squares, and serving. :) I didn't get any pictures of a piece plated... mostly because when I cut it up the cake still wasn't cool and the whole thing started to fall apart into a big mess. haha

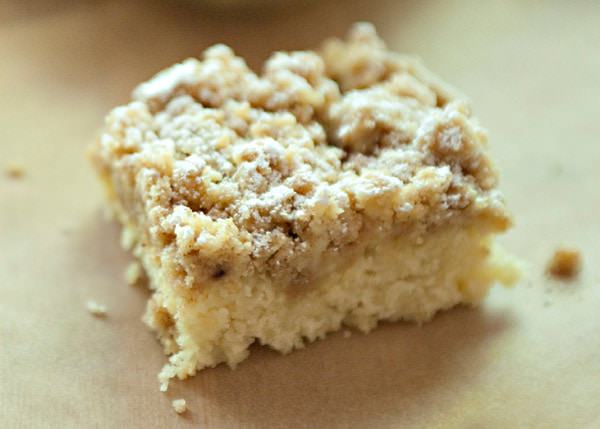
But here it is done!


My verdict- the cake was a flop.
I guess my only experience with crumb cake is little debbie's coffee cakes, but this was definitely not what I was expecting. I could really taste the extra salt, which made the cake feel dry. (We all helped ourselves to big glasses of milk to help ease it down.) Despite the "dryness" and even though my fork came out clean- the inside was still all goopy and didn't seem cooked properly.

Everyone else seemed to like it OK- Andrea had another serving... but usually when I bake something it goes fast and this cake was untouched after those initial servings. I didn't HATE it... but I know I definitely didn't feel like having another slice either.

Brandon says he thinks the cake turned out the way it was supposed to and I just didn't like that kind of cake. I'm still not convinced. I feel like it's my mission to fix this recipe and create the perfect moist and crumbly crumb cake.

While I was eating it I kept saying that I thought it needed to be sweeter.  Mike and Andrea protested saying that if it was any sweeter it wouldn't be edible. lol I think it was the powdered sugar that made it "sweet"- but the cake itself definitely needed some softer warm flavor tones. I was thinking "sweet" but now I'm thinking maybe it needed a little more vanilla. I might even try some nutmeg.

I'd like to also try keeping it in the oven longer to see if the bottom would bake more thoroughly.  I might also cover the top with foil to keep it from browning if I keep it in longer. And I will definitely let it cool completely before I slice it. Sometimes it just needs a little more time to set-up and that might help with the "goopiness".

Ah... I don't know. Either way- that's that.

Have you ever made crumb cake?  
Do you have a good recipe or any tips to share?

Friday, March 23, 2012

A Very "Hoppy" Birthday!

My good friend Skye's daughter just turned a year old! They are all growing up so fast...
I feel like just yesterday Skye, Michelle, and I were sitting in the van in the church parking lot after young women's talking about boys and school and whatnot. Now we're all moms with "grown-up" lives! It's all happening so quickly!

Thinking about what "Graham" (meaning Brandon and I) should get Andrea (that's Skye's daughter's name) for her birthday- I reflected back on Skye. (Because let's be honest. The presents aren't really FOR the one year olds.) When we were growing up, Skye was the very definition of a "tom-boy". She was against all things girly and I know it came as quite a shock to her when all three of us had our first children and she was the only one to end up with a girl. 

I know it was a tough mind-set adjustment for her- but I have to admit a year later she is doing an awesome job of raising a great little girl. :) (She even wears pink sometimes!) Skye and I had recently talked (At Michelle's baby shower for her second little boy!) about the hair clips generally sold for little girls. Skye was less than thrilled at the OVERLY "girly" selection. I know I've seen cute little dinosaur, robot, etc... hair clips around- but when I went to the store I found Skye was right and my only options were pink, hearts, flowers, ribbon, purple, and more pink.

blegh.

Pink is all and good sometimes- but ALL the time? I think not. So, I set-out to do what any crafter would do. I would MAKE some "cool" hair clips!  The task turned out to be easier in my head than in reality.  My "plain" hair-clip choices were limited and I settled on some polka-dotted clips.  Then Brandon and I scoured the store looking for anything "cool" that would be workable on a hairclip. 

We looked in the toy department, the scrapbook department, the craft department... and found nothing.  Finally- grasping at straws, we checked the party department and found these cute little frogs being sold as party favors. I was unsure- but Brandon convinced me of their awesomeness and I bought them.

When I got home, I carefully removed the hairclips from their cardboard holder. (I would be using the cardboard again to display my finished clips.) I then opened my little frogs and laid-out my supplies as my hot-glue gun warmed up. This is where my "creativity" would come into play.

I needed to select which frog would go on top of which hair clip.


I also double-checked that the frogs would fit on the hair clips without being excessively huge or awkward.  They happen to have nice flat bellies so that helped with the gluing process.


After each frog had a hair-clip mate, I set to gluing!


Important Tips for This Craft:
1.) Don't use too much glue. It looks tacky and you have to spend time peeling off the extra when it's cool. Also- dry hot glue can stick to hairs and pull them, making your hair clip uncomfortable to the wearer.
2.) Do not attempt to remove excess hot glue from your hairclips until the glue has dried.  Hot glue just becomes long skinny strings as you pull it. After the glue is dry it will snap right off and clean-up will be easier.
3.) Lay-out your frogs (or whatever you're using for decoration) on the hairclips before you glue, and make sure that if you are creating "pairs" that there is a decoration facing "up" on both directions... I hope that isn't too confusing.  Basically what I'm trying to say is- when you wear two hairclips- you put them on in opposite directions (for the opposite sides of your head). If your frogs aren't reversed, one of them will be upside-down when you go to wear them both at once. (Refer to how the clips were placed on the card when you bought them- imagine that all the decorations should be facing up.)


When I was done I carefully slid the frogs back on their card and voila!
A very "hoppy" birthday present! :)

Unfortunately Brandon caught a bug the day of Andrea's party so we weren't able to drive up... but hopefully we can get Andrea her clips soon and we can see how well they work functioning on an actual little girl's head.  I think they are adorable- but I'm concerned about the legs getting caught in her hair.  This project has my wheels turning thinking of what else I could glue on hairclips.  Little girls can get away with wearing all sorts of cool stuff in their hair. 

I wonder what my Middle Schoolers would think if I came in to teach with a little tree-frog propped on my head? I teach Science after all... ;)

DIY Wall Art- {In Progress}

I've been on Spring Break! (whoo hoo!) So I apologize for the large gap in posts. 
Being on break has given me a chance to really reflect on a lot of things- including my house. My husband and I have moved a lot in our 3 years of marriage, and  anything that wasn't absolutely necessary or absolutely loved has since been lost, donated, or unfortunately broken. This includes the large majority of anything that goes on our walls.  

Now that we've moved into a new townhouse and it looks like we're going to stay for awhile, I'm eyeing my naked walls and the wheels in my head have begun turning thinking about what I can do to cover them.  My first post was about the paintings I did in my living room- and I kind of want to stay on the same track. (...free I mean.)

Even if we do stay here for a long time- I'm not compeletely invested in purchasing large portions of expensive decor just yet.  So- I browsed my faithful inspirational friend: Pinterest.

And here's what I came across:


(These particular images pop up in google image search for "toilet paper roll wall art" which is why they aren't cited.) 

Pretty neat huh? And GENIUS! I mean... we all use toilet paper right?  (please just say yes for the sake of my public restroom sanity.) So just start saving up those puppies because you can slice them up and stick them together into virtually any design your creative little mind can come up with!

I only have a few saved up so far so I don't have enough to really create anything as of yet- but I couldn't resist laying out some patterns for fun.  Here's some of my (not so creative/ copy-cat) brainstorming so far. 


After I have enough I plan to staple them together (... way too lazy for glue. Plus then you'd need to clip them together until they dry. However, I do think it would probably look nicer.) and then I'm going to spray-paint the whole thing a single color before hanging it on my wall.  I also considered getting a really fine glitter spray to go over the top- but I'm thinking that may be too much for right now.

The nice thing about this wall art (I mean aside from it being cheap AND easy) is that it's already built to nicely hang on nails.  No additional "now how do I actually get this on the wall?!" thoughts necessary. I'm definitely excited!

So next time you're cooling your buns on the toilet- don't feel guilty going a little liberal on your T.P. usage. That just means you're one step closer to more supplies for this spectacular project!

I love upcycling projects.
What are some Toilet Paper Roll crafts you have tried?

(... I feel the need to say I am in no way endorsing the over-use of paper products. That is wasteful. But please make sure your bottom is clean.)

Tuesday, March 13, 2012

Love Notes

One of my best friends gave me these magnet letters for my 21st birthday.  I think they actually got left on our fridge during a rushed move... (story of my life) but I found this picture I took for Brandon saved on my phone.


Everyone has their own "love language(s)"- but for me "quality time"/ "acts of service" have to be my top faves.  I love just about anything that shows me someone went out of their way to think about me.  Love notes- or friendship notes- are especially awesome in my opinion.

Take a couple of seconds and write a quick note to someone you care about. (... "I love you" is always a great safe option if you don't feel like being creative.) Even if a few words scribbled on some notebook paper would be kind of lame by itself- sometimes snapping a photograph of your note and adding some effects with a photo editor can give your message that little bit of extra thought and effort to make your message go the extra mile.

Valentines day is still fresh on my mind. I didn't have time to make all the cute and cheesy valentine cards I had on my mind- but sometimes simple is the sweetest.

What are some of your favorite cheesy love-note quotes?
Have you ever received a note from someone that made your heart all gooey?

Monday, March 12, 2012

Bananas over Banana Bread

I grew up honestly thinking I HATED banana bread. But a few months ago I had some rotten bananas and I thought "oh what the heck..." I googled a recipe and low and behold out came a moist, sweet, delicious concoction! One sniff of that bready-goodness and I couldn't help but have a couple of slices   with butter melted right on top.  I ate that stuff like cake!  Soooo good.

I also learned that apparently banana bread is one of Brandon's favorites!  He lucked out because I probably wouldn't have ever tried it if we didn't have those mushy bananas hanging out on the counter-top.

I've figured it wasn't the banana bread I hated... it was the stale dry banana NUT bread old ladies from church would always give my mom for visiting teaching.  Dreadful stuff. Seriously like cardboard or something. ugh.

But this--- THIS... is GLORIOUS.


Ingredients:
2 cups flour
1 teaspoon baking soda
1/4 teaspoon salt
1/2 cup butter
3/4 cup brown sugar
2 eggs (beaten)
2 smushed overripe bananas

Directions:
1.) Preheat oven to 350 degrees F (175*C) and lightly grease a 9x5 inch loaf pan.
2.) Combine flour, baking soda, and salt in a large bowl.  
3.) Cream together butter and brown sugar. Stir in eggs and mashed bananas until well blended.
4.) Stir banana mixture into flour mixture; stir just to moisten.
5.) Pour batter into prepared loaf pan and bake for 60-65 minutes. (Until a toothpick inserted into the center of the loaf comes out clean.)

Let bread cool in pan for 10 minutes, then turn out onto a wire rack.
Slice while still warm and top with butter.

EAT LIKE CAKE!

Happy Baking!


Sunday, March 11, 2012

Hard As Nails

I have four adopted sisters.  I was older when they joined our family so I kind of lucked-out in the sense that I get all the good sisterly-bonding memories without all the not-so-good sisterly-bonding memories. ;)  

One thing I used to always do when I lived at home or when I was at college and I'd come home for long weekends was paint their nails. I'd go crazy with all sorts of fun polka-dot and stripe designs.  Now I see all sorts of crazy nail creations online, and I'm humble enough to admit I do NOT have that kind of skill or patience.  But it is nice to get a little funky and fun once in awhile. 

These pics are from the last nail-painting party I had with my sisters. I painted theirs and then I decided what the heck and gave mine some style too. ;)  At the time I was interning in a 2nd grade classroom so I was pretty much the coolest person around with my blue and silver polka dots and red hearts.


Life is short- it's good to have some fun.

I always get bummed and don't want to paint my nails because they always seem to chip off before I even get a chance to wear them out.  I just heard about a cool new kind of nail polish though from our good friend Sally. Apparently it basically cements your nail-tastic artwork down so it doesn't go anywhere until you take it off with remover.  I think that sounds pretty spiffy. I may have to try it out and send a product review your way.

What are some of your favorite ways to paint your nails?
Do you have a favorite color or do you prefer to leave your nails naked and free?
Do you ever go to a salon or are you a DIY kind of manicurist? 


Saturday, March 10, 2012

Here Kitty Kitty...


This is Midnight. When I was in the 5th grade my neighbor's barn cat had kittens and Midnight was the runt of the litter. She's been my baby ever since and recently I've been missing her a lot.  Currently she lives at my parent's house with other cats and many people.  She was recently diagnosed with hyperthyroidism and allergies. :( She hasn't been feeling too good and I wish our landlady was legit with us keeping a cat because I feel like she really needs to be babied.

I suppose having a human baby IS a thousand times better- but animals have a way of finding their own little niche in your heart that really can't be filled any other way. 

So- as I'm thinking about Midnight I wanted to write a post for a pet-friendly craft.
DIY catnip mouse!


...like most of my posts recently- this is an old craft. (...I apologize for the horrible quality in pictures.) 

This is a super simple project that really doesn't take much explanation.  One day Brandon and I were at the store looking in the pet aisle and I found a big bag of dried catnip.  After comparing the bag to the smaller more expensive catnip toys- I splurged on the bag with the hopes of creating something for my kitty at some point in the future.

The bag lay forgotten in the back of our spice cabinet. (...looked pretty suspcious- but we were newlyweds and living on the edge. haha) And one night Midnight and I were playing with a piece of string and I suddenly had an impulse to create something!  Rummaging through my box of fabric scraps I found a few pieces I liked. I cut out two tear-drop shaped pieces of green and white striped fabric, and four smaller tear-drop shaped pieces of orange plaid fabric.  I sewed the drops together right-sides in and turned them right-sides out so eventually I had a mouse-like shaped pocket.  

I took a piece of embroidery floss and tied a knot in the end before sewing it to the rear of my "mouse".  Then I took a piece of paper and funneled the catnip in before sewing the whole things shut and stitching on a pink nose and little blue eye.

In my mind- the mouse was a little more three-dimensional... but I didn't really plan appropriately for that.  It was kind of scrappy- but for a kitty toy that totally worked. Also, the flat shape ended up being for the better because Midnight reacts to catnip in a "let me rub my face in this like I'm a sloppy drunk" rather than a "I'm going to play with this like an actual toy". So the less the mouse moved around and the more it just lay flat on the ground the better (and safer) for my poor drugged-up kitty. haha

This picture doesn't do the whole situation justice- but man she loved that thing!  She literally had it for over a year- and would rub on it until the very end. (I think it got lost in our last move. sad.)  Eventually she did start to play with it a little more and she'd fling it up into the air and chase it as it slid across our kitchen floor.

Not my best sewing effort. But it was fast and lends itself to tons of inspiration.  You could literally sew just about any kind of shape/animal/ etc... and so long as you stuff it with fresh dried catnip your feline friend will love it. :) 

Happy Sewing!